Saturday, March 16, 2013

MAC Large Duo Pro Palette Review with Photos!

MAC Large/Duo Pro Palette

MAC Large Duo Pro Palette ($25) is a new double-sided pro palette that accommodates two inserts. It has a see-through lid/divider so you can view all of your shades at once while keeping them secure and protected. What's cool about this palette is that you can customize it any way you want. For example, you could turn it into an every-day palette and put blushes, bronzers, etc on one side and eyeshadows on the other.

All of the inserts are sold separately, and they all retail for $9 each. You have the option of purchasing a 15-eyeshadow insert, 6-blush insert, 12-customizable insert (usually for cream foundations, concealers, etc) and 24-customizable insert (for lipsticks and other cream products).

So, if you were to purchase the palette and two inserts, it would cost you $43.

I never use the inserts on any of my palettes, so I took the route of skipping purchasing any inserts for the time being to see how I like the palette as is.

The palette itself is slightly shorter in length than the old style palettes and almost three times the height. Some may find it to be bulky, but I love the fact that the palette is deeper than the old palettes, so there are no issues closing it, unlike the older MAC palettes. It shuts with a magnetic closure, which is really nice.

The old palettes held 8 blushes side by side with no divider. What dissapointed me about the duo palette is because it's slightly shorter, it doesn't hold 8 blushes nicely and uniform like the old palette. Nevertheless, it does hold 8 blushes with a little shifting around.

If you have nails, the clear middle divider is easy to lift up. Sometimes I have trouble with it, which can be slightly annoying, but you can just tilt the palette to get the divider to swing to the other side.


Friday, March 15, 2013

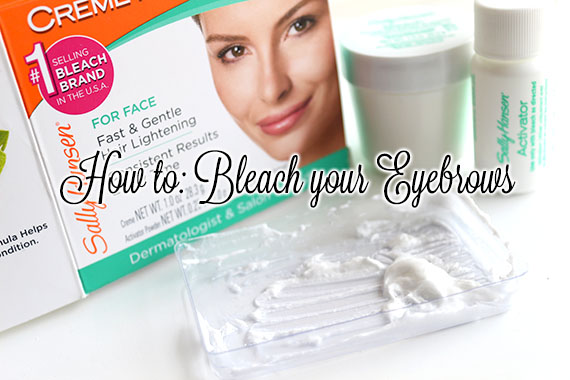
Step by Step: How to Bleach your Eyebrows!

How to: Bleach your Eyebrows

Bleaching my eyebrows was always a part of my regular beauty routine back when I had blonde highlights in my hair or when my hair was a lighter shade of brown. Everyone has their own preference and opinion about matching your eyebrows to your hair color or just bleaching/coloring the eyebrows in general (some like it, some don't), but when done properly, it can really enhance your look.

My eyebrows are very thick, coarse, dark, naturally high arched, non-symmetical (meaning they don't match) and grow quick. Or in other words, nightmare brows. So, I usually have a hell of a time getting them to match every day.

Because I have quite a bit of filling in to do, they can sometimes look too harsh, dark or obvious. I also think that when my brows are super dark, it can create too much emphasis on them, taking away from other features of my face. When they're lighter, the emphasis is taken off my brows and creates more emphasis to my eyes and lips.

In this post, I'm going to briefly go over how you can achieve lighter eyebrows in some really simple steps.

Tools Needed: 

  • Facial Bleach (I'm using Sally Hansen Creme Hair Bleach for the face)
  • Spoolie (or a clean cosmetic wand)
  • Vaseline (optional)
  • Purple Shampoo or Hair Toner (optional - I'm using Clairol Shimmer Lights Shampoo)

My Eyebrows before and after bleaching them. 

Sunday, March 10, 2013

Nars Lola Lola and Night Fever Eyeshadows Review, Photos & Swatches!

Nars Lola Lola and Night Fever Eyeshadows

I recently purchased a couple new Nars eyeshadows to add to my forever growing collection. Like I need any more eyeshadows, right? Well, after these I'm probably done one for a while.. don't quote me on that though.

I'm all about simplicity on most days, so I love a good eyeshadow single that can make me look quickly polished without the help of any additional eyeshadows.

Nars Lola Lola Eyeshadow is described as a neutral brown with shimmer. It looks copper/brick toned in the pan, but once swatched, the color is more muted and neutral. It definitely has some soft reddish tones (no yellow-orange) mixed with silvery/gray pigments, so it doesn't lean warm.

It's actually more unique than it appears. The slight shimmer/frost really pulls this shade together and makes it a really pretty, elegant shade. It's a nice shade for any eye color, but I'd think it would look especially nice on blue and green or hazel eyes.

The eyeshadow itself is super soft and pigmented and blends like a dream. I've been wearing it alone on  my lids and lower lash line for a soft daytime eye. I like that it's not super intense and has a softness about it so it's a shade that I can wear every day.

Nars Night Fever Eyeshadow on the other hand is a super dark and intense shade that I thought would be a great eyeliner shade. Night Fever is described as a black with red pearls. Pretty Simple. It's a super dark, matte black filled with fine red shimmers.

It's one of those shimmers that disappears when you wipe it, so to get the shimmer to show up, you have to pat the eyeshadow on as opposed to sweeping it. If you sweep it on, you'll only get a matte black. It doesn't transfer well when applied dry, but applied on top of a base (preferably a sticky one), it really helps the shimmers stick. They also show up when applied wet, but regardless, if you want the shimmer to stick, you need a creamy base and you have to dab it on.

Truthfully, I think it's too much work and I'd recommend skipping this shade all together. MAC Beauty Marked Eyeshadow and NYX Sensual Eyeshadow are both similar alternatives for a lower price.

To see these two shades in action, check my previous post where I'm wearing Lola Lola on the lid and lower lash line and Night Fever on the outer corners.


Friday, March 8, 2013

My Face of the Day.


Haven't posted one of these in ages! This is pretty much my usual makeup look using all products that I use on a regular basis. I don't wear false lashes often, but I recently ordered some Red Cherry Lashes and I've been wearing them almost every day because I love them so much! Strangely, my eyelashes are almost non existent as of lately and I'm not sure why. I think since I've begun using Covergirl Clump Crusher Mascara, I've lost all of my lashes. (This happened to me when I was using Covergirl Lash Perfection too - good mascaras, but for whatever reason, they pull my lashes out) So I've been resorting to falsies for the time being and I purchased the Ardell Brow & Lash Growth Accelerator treatment I used in the past to grow my lashes back.

I've had a few questions regarding my eyebrows because they are lighter than they were before. I bleach them every three weeks using Sally Hansen Creme Hair Bleach and I've switched to a lighter shade in my Make Up Forever Aqua Brow. I really like the way they look now.

Products Used-

Face
Le Metier de Beaute Peau Vierge (tinted luminizer, skin treatment and spf - used as a base)
MAC Pro Longwear Concealer NW25 (applied under my eyes)
Guerlain Parure Extreme Foundation #3
NARS Laguna Bronzer (applied all over the face)
NARS Oasis Blush (applied to the cheeks)
MAC Superb Extra Dimension Highlighter (applied to the highest points of my cheeks for shine)
Ben Nye Neutral Set Powder (applied to my undereyes and t-zone to set foundation)

Eyebrows
MAC Spiked Eyebrows Retractable Crayon (used to shape my brows)
Make Up Forever Aqua Brow #15 (used to fill my brows in)
MAC Girl Boy Brow Set (tinted brow gel)

Eyes
Nars Lola Lola Eyeshadow
Nars Night Fever Eyeshadow
Red Cherry #82 Eyelashes (my new favorite lashes!)
Covergirl Lash Blast Fusion Mascara

Lips
MAC Soar Lip Liner
MAC Insanely It Sheen Supreme Lipstick (very lightly dabbed on my lips)
Nars Super Orgasm Lipgloss (my new favorite lipgloss!)

*Nars eyeshadows not pictured.. oops!


I'm working on a post as we speak on the Nars Eyeshadows I used in this look - it should be up in a couple of hours!