Showing posts with label Brows. Show all posts

Monday, October 28, 2013

NARS Brow Gel Review, Photos and Swatches!

NARS Brow Gel in Piraeus

NARS Brow Gel

NARS Brow Gel ($22) is a new product by NARS that tidies and grooms the brows with a glossy gel formula. A unique precision tapered brush adds shape and definition to every angle while creating a fuller, smoother brow look.

NARS Brow Gel is available in (4) shades: Oural (clear), Athens (blonde), Piraeus (medium brown) and Kinshasa (dark brown).

I'm a dark brunette, but I like my brows to be at least one shade lighter than my hair, so I chose the shade medium brown which is a soft, chocolately gray-brown. All of the shades appear to be very neutral (see swatches on Café Makeup) which is very ideal for the brows.

I love tinted brow gels because my natural brows are very dark and if I fill them in with a dark brown color that matches my brows, they can sometimes look a bit harsh. So I like to finish my brows off with a tinted brow gel in a shade or two lighter than my brows to lighten them up slightly so they have a softer appearance. The lighter gel adds almost a highlight to my brow, creating texture and definition as it coats my brow hairs.

Now, if you have very light or invisible brows, tinted brow gels can work to your advantage by choosing a shade darker than your brows and lightly combing over them to bring more attention to them.

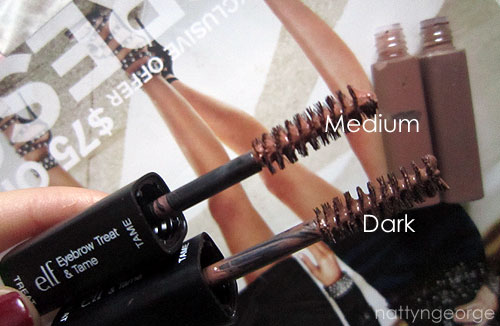
In comparison to MAC Brow Set, NARS is more of a gel formula (similar to E.L.F. Studio Treat and Tame) whereas I find MAC to be more creamy and mascara-like, and a bit more pigmented.

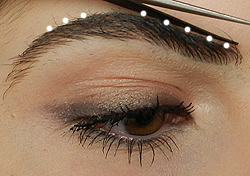
As with many tinted brow gel formulas, a lot of product gets dispensed on the brush - almost too much if you have very sparse or thin brows. You can try wiping off the excess on the opening of the tube, but for the most part, I like taking a separate spoolie and patting it on the wand of the brow gel so I'll only pick up very little product and comb it through my brows. I do the same when working with MAC Brow Set, as the colored formulas can deposit too much color at once.

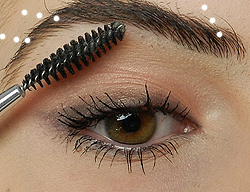
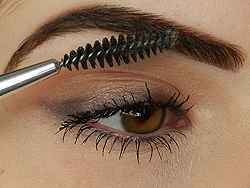
I really like the small tapered brush. It's easy to manuever through the brows.

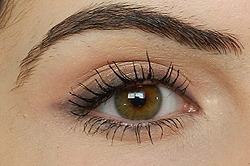
The hold is really good, and it keeps my unruly brows in place all day.

NARS Brow Gel in Piraeus

NARS Piraeus Brow Gel

Thursday, October 24, 2013

NARS Brow Perfector Review, Photos and Swatches!

NARS Caucase Brow Perfector

NARS Brow Perfector

NARS Brow Perfector ($22) is described as a "velvety" adjustable eyebrow pencil for creating slender to full brows. The pencil applies with smooth precision and ease. The tip has a unique oval shape for precise application and varying brow widths. The result is natural and long-lasting.

NARS Brow Perfector is available in (4) shades: Salzbourg (blonde), Kalamata (light brown), Caucase (brown) and Suriname (black).

My eyebrows are dark brown, and I opted with the shade Caucase. It's slightly lighter in color than my natural brows, but it works well. I could have chosen the darkest shade Suriname, as even though it's described as black, it's actually a dark brown (See Temptalia's Review).

NARS Caucase Brow Perfector

The consistency of the pencil is very stiff and dry at first. You have to break it in a little bit after the first use and it will warm up the product in order for it to apply better. It's like a very waxy crayon - the best comparison would probably be the Maybelline Master Shape Brow Pencil ($8), but it's much stiffer. Same waxy consistency though and similar color payoff.

The color payoff is never really completely opaque, so if you have a lot of shaping to do, or if you have coarse, sparse brows, I wouldn't really recommend this pencil. This pencil doesn't create smooth, fluid lines, and you have to continuously make small passes over areas to build the coverage. For those such as myself, I need an opaque product that will provide clean, crisp lines to shape my brows and then I can go in with something lighter and more natural to shade them in. This is a great product for that. It's also great for those who have minor filling in to do, or those with fine brow hairs that need to do some light filling in.

The result is really natural, which is something I really like. They don't look harsh or obviously filled in. Also, the waxy texture really holds the brow hairs in place, so I don't find a brow gel/finisher necessary. It also doesn't fade, smear or budge the entire day.

NARS Caucase Brow Perfector

Monday, October 15, 2012

Step by Step Eyebrow Filling Tutorial.

How to Fill in the Eyebrows

Everyone uses different brow filling methods - some swear soley by pencils, while others prefer brow powders. You may even prefer a cream product (such as a brown cream liner) or a brow-marker (such as Milani Brow Tint Pen). I love switching up products all of the time, so my brow routine changes often. Today, I'm going to go through one way I fill in my brows using both an eyebrow pencil and an eyebrow powder.

Don't feel the need to go run out and purchase a brow powder - Any matte brown eyeshadow similar to your hair color will do. Although we all favor and thrive for eyeshadows with lots of pigment, we don't necessarily look for the same in our brow products because we want our brows to look to look natural. So, finding an inexpensive shadow at the drugstore should be a sinch. And, if you don't own an eyebrow pencil, you can use a brown eyeliner - but don't apply it straight on as it can look too intense for your brows. Scribble on the back of your hand, and run your brush through the product for a more natural look (or you can just lightly rub your brush across the tip of the pencil).

I don't always use both products, but I like combining both because the pencil yields a very precise, clean line, whereas the brow powder gives a softer, more natural diffused line. The result is a very clean and precise brow, yet it's not as clean/chiseled as it would be if only a pencil was used.


Products I used in this tutorial-
Anastasia Highlighting Brow Kit
MAC Eyebrows (Pencil) in the shade Spiked
MAC Studio Finish Concealer
MAC 208 Angled Brow Brush
MAC 194 Concealer Brush
E.L.F. Eyelash and Brow Wand (Spoolie)
Tweezerman Brow Shaping Scissors
Revlon Tweezers
Eyebrow Razor

Here's the classic diagram of where your brows should ideally start, arch and end. Since we all have different face shapes, natural brow shapes, etc, this figure might not work for everyone. It's often referred to as the ideal brow - with the beginning of the brow lining up with the side of your nose (if you hold a pencil vertical to your nose, it should line up with the beginning of your brows). But depending on the symmetry of your nose, placement of the eyes (if they are very far apart for instance), etc, this method may not work. Instead, use your tear-ducts as a reference of where your brows should start. The arch should ideally line up with the edge of your iris. Your brow should ideally end diagonal (45 degrees) from the outer corner of your eye.

Friday, August 10, 2012

Milani Brow Tint Pen Review, Photos and Swatches!

milani brow tint pen review

Milani Brow Tint Pen

Milani Brow Tint Pen ($5.99) is a quick-drying and long-wearing felt-tip eyebrow pen that is used for filling and shaping the brows. It has a fairly fine point for precise application.

The Milani Brow Tint Pen is available in (2) shades: Natural Taupe and Dark Brown.

Natural Taupe is a light brown that will work well for most light hair colors, while Dark Brown is about one shade deeper of a brown, with an ash-brown/moss green undertone (no red tones at all). Natural Taupe has a warm undertone, without looking too brassy.

The pigmentation is very sheer. The color is buildable to a light-medium, but the color will never reach opaque pigmentation. Because of the sheer color, it's excellent for darkening/adding color to sparse and fine brows.

I like applying Natural Taupe through my brows to deepen them, and go back with Dark Brown to areas that need a little more definition. The result is very natural, clean brows.

milani brow tint pens

milani brow tint pen before after

Wednesday, July 25, 2012

Spotted Maybelline Define-a-brow Eyebrow Pencil at Dollar Tree!

maybelline define a brow

I know the Maybelline Define-a-Brow has been a drugstore brow-filler favorite among many of us (including myself) and was shocked to see it on the rack at my local Dollar Tree today. There were at least twenty of them, all in the shade Dark Brown. Many have compared this pencil to the MAC Eye Brows retractable brow pencil - I agree!

Apparently Maybelline hasn't discontinued the product, but they discontinued the shade "Deep Brown", which confuses me because I'd assume it'd be a popular shade for dark brunettes.

I think they're trying to re-direct consumers to their newer brow product, the Maybelline Master Shape Brow Pencil, and won't be surprised if they get rid of Define-a-Brow all together. They aren't really comparable products, I like both, but Define-a-Brow has an advantage, as it's retractable (no sharpening) and the product has a small tip (for precise shaping of the brows). Maybelline Master Shape has to be sharpened frequently and due to the soft waxy texture of the pencil, you can't get a very sharp point.

I know stock of discontinued cosmetics will differ from location to location, but I just wanted to make sure you were all aware that you might be able to spot this pencil at Dollar Tree. It's regularly around $8, for only $1 at Dollar Tree - very well worth it!!

maybelline define a brow before and after
My eyebrow before and after it has been filled in with Maybelline Define-a-Brow in Dark Brown.

Wednesday, December 28, 2011

Review: Maybelline Eye Studio Master Shape Brow Pencil (Swatches + Before & After)

Maybelline Eye Studio Master Shape Brow Pencil

PRODUCT DESCRIPTION: 
Master Shade: Subtle color pigments enhance your natural brow look
Master Shape: soft grooming brush adds final definition
Master Hold: exclusive wax technology keeps brows in place

Opthomologist tested - safe for sensitive eyes - Contact lens safe

Application: Fill and define brows using small, light strokes following natural brow shape. Groom brow upward and outward with brush to blend color and set brows.

What it basically is, is a tinted wax pencil. It's a little bit different than a retractable crayon (Maybelline Define-a-Brow or MAC Brows) for instance, as it's less crumbly and less pigmented. It's also the case for a standard brow pencil. Although heavy pigment is awesome for an eyeliner, it's a little less awesome for your brows.

As far as I know, it's available in four shades: Blonde, Auburn, Soft Brown and Deep Brown. This product is so new that it hasn't popped up on the Maybelline website yet, so I'm sure if there are any other additional shades.
 (Photo snapped in Walmart last night) From Left to Right: #260 Deep Brown, #255 Soft Brown, #265 Auburn and  #250 Blonde.

I picked up Deep Brown, as my hair is a very dark brown with no golden tones.

CONTINUE READING FOR SWATCHES + BEFORE & AFTER!

Wednesday, May 25, 2011

Grow your brows with Castor Oil!

Castor Oil
Castor oil is a highly emollient oil, often used in lipsticks and other beauty aids. Castor oil is the perfect skin care product as it is naturally rich in anti-oxidants and works as a deep conditioner to heal both skin and hair. Because of castor oil's healing qualities, it is often use to soothe skin disorders such as eczema and psoriasis and can help to thicken hair and reduce hair loss.  
(Source: http://www.ehow.com/how_2126679_use-castor-oil-as-beauty.html)

Castor Oil for the Brows has a 4.3/5 rating on makeupalley.com, with a 87% re-purchase rate based on 174 reviews. (click here to read reviews)

I purchased my Castor Oil at Whole Foods for less than $5. It doesn't have any real scent/odor, it sort of smells like plastic to me. It's extremely thick like molasses, so you only need a small drop. A little goes a long way. You can use a cotton swab or a spoolie to apply it. A spoolie works a little better for me because my brows are thick, but for those of you with very sparse brows, a cotton swab is the way to go. Apply it every night to your brows, and cross your fingers for thicker brows in the near future.

My natural brows are coarse and thick (my middle eastern genes). I have to trim them every couple of weeks, otherwise the hair would be too long and unruly. I also have to pluck my strays every other day because they grow quickly. When I was younger, I had very large/full brows and at around 13 years old, I shaved them very thin. Although my brows do grow quickly, they aren't at all as "full" as they were before. The hairs never seem to grow in the areas I want them to. Neither of my brows match, and I rely on my side bangs to camouflage the fact that one of my brows is slightly higher than the other. Of course, I fill my brows in, so it's something I always correct, but if they filled in a little bit more, it would be easier to match both brows.

My left brow is slightly higher is also shorter than my right. Although you can't tell because my nose isn't pictured, my right brow reaches the side of my nose as it should, and my left brow is about .5 cm short. The hair doesn't at all grow past that, so I always have to color it in farther, or tweeze my right brow to match. 

Anyway, I'm hoping that with the daily use of Castor Oil, my brows will fill in a little bit more, so I only have to fill them in very minimally. 

I am going to use pour a little oil in a small travel container and apply it to my brows every night. I will keep you updated how well the progress goes. If the progress is minimal, I'll post every two weeks. If I see a difference, I'll be posting every week. So, I'll see how it goes. If you want to keep track of my progress, you can always message me on twitter! (Click here to follow me) 

Castor Oil is a very versatile oil, and can be used for many things. I'm going to try using it as a deep conditioner for my hair as well at least once a week. I tried it out a couple of months back on my hair, and it really seemed to work well. It can be used on any dry areas, blemishes and on your scalp for thinning hair.

Have you used Castor Oil for any beauty purpose? Share your experience in the comments below!

Wednesday, May 18, 2011

MAC Show-off and Girl Boy Brow Set Review, Photos, Swatches and Comparisons!

mac brow set review

MAC Show-off and Girl Boy Brow Set

MAC Brow Set ($15) is a brush-on gel that brushes the brow hairs in place and deposits a sheer tint to the brows. Think of it as mascara for your eyebrows! It doesn't stiffen the brows, and it doesn't flake. It can also be used on the sideburns and facial hair. 

MAC Brow Set is available in four (4) shades: Clear, Girl Boy (Fawn blonde), Beguile (Full-bodied taupe) and Show Off (Rich brown). 

MAC Girl Boy Brow Set (left) and Beguile Brow Set (right)


Wednesday, February 23, 2011

Tutorial: Create Natural, Defined Brows with a Creme Product! (I'm using MUFE Brow Corrector)

Today I will be showing you how I use the Make Up Forever Brow Corrector. I know many people are interested in trying the product but don't know how to use it. You can obviously improvise if you don't have the MUFE Brow Corrector and use any brow pencil or creme liner. I have read that some people use MAC Dipdown Fluidline or MAC Quite Natural Paint Pot as a brow filler. It may seem odd to you that creme liners can be used for your brows, but applied sparingly with a light hand you can end up with beautiful brows that are natural looking and won't budge all day. Pencils that work well are ones that you can sharpen to a good point that aren't too soft or retractable "crayon" liners such as MAC Brows or Maybelline's Define-a-Brow. These brow pencils work very well because they don't smudge as easily as pencils, the formula is pigmented (but not overpowering) and the consistency is dryer than regular eye pencils, which is essential for creating natural looking brows.


Products used in this tutorial:

Coastal Scents Precision Angled Liner Brush
E.L.F Studio Eyebrow Treat & Tame
MAKE UP FOREVER Brow Corrector #3


I am using a small eyeliner brush that is bent so you it's easier to apply liner and make precise lines. I prefer this particular brush for the brows because the tip is short, dense and comes to a point. I can make very precise lines with it. If you don't have a specific liner brush, an angled brow brush can work too. The thinner the tip is, the better. I am using the ELF Treat & Tame to set my brows. It is a tinted brow gel that adds a tiny bit of color to your brows so your natural brows will blend in with the parts you filled in. It also will keep your brows in place so the hairs are all going in the same direction. MAC has a similar product called Brow Set, which is a product I love as well.

  • If necessary, tweeze & trim your brows and/or stray hairs as you normally would. 
  • It's your preference if you like to apply foundation before or after your brows, but I usually do my brows last. It's much easier in my opinion. If you have oily skin or tend to get an oily t-zone. Set the area with powder so your brows won't get shiny or smear throughout the day. 

Step 1: (If you are using MUFE Brow Corrector) Dab a tiny bit of product onto a clean surface. If you are using a potted creme liner, you can dip your brush directly into the product. Make sure to dab it off on a clean surface or the inside of the lid so you don't apply too much product in an area at once.

Step 2: Line the underside of your brow. Follow the shape of your brow. This area should be the most precise as it is where your brows would normally be waxed, tweezed or threaded. The top of your brow is where it's supposed to look the most natural.

Step 3: Dip your brush in the product again. Wipe off any excess. You don't want your brush to be very coated in product. Look at your brows in the mirror and decide where you would like to begin. I typically fill my brows in starting at the beginning. With the tip of the brush, you want to create small, thin lines to give the illusion of brow hair. Whatever spots you wish you had more hair in, draw small lines in the same direction as your hair. Don't use very much pressure - you want the tip just touching/grazing your skin. You want thin lines that aren't too dark. You want it to blend in well with your actual brow hairs. You can practice on your hand first.

Step 4: After you've followed the top line of your natural brow, you want to accentuate your arch. Draw a small line above your natural arch in the direction of your hair growth, and connect your brows (still using the same technique) from where you left off in Step 3 to the highest point of your arch. It should look very natural.

Step 5: With any excess brown pigment from the product left over on your brush, go over your brows to darken any areas that need it. The end of your brow should be the lightest as you have the least hairs there. If it needs to be extended, do this with the residue on your brush.

Step 6: Comb your brows in place with a spoolie, clear mascara or tinted brow mascara to set your brows.
My brow looks very arched in this photo because of the angle I took the picture. Don't worry they aren't that triangular.. LOL

  • If necessary, take a small concealer brush with your favorite concealer and outline your brow and then blend it into your skin to cover up any mistakes, or if you made your brows too thick.
  • Add a shimmery highlight under your arch to make your brows look even more polished!
I hope your found this post helpful, and if you have any questions.. make sure to post them below!

Wednesday, December 8, 2010

Review: ELF Studio Eyebrow Kit & Eyebrow Treat & Tame + Swatches & Photos!

I have a couple more reviews of ELF Studio products for you tonight!

Considering I haven't tried any ELF makeup prior to my recent order, I really had no idea what to purchase. So I basically purchased items that had the highest ratings. The "Eyebrow Kit" is rated 4.5/5 stars based on 300+ ratings and the "Eyebrow Treat & Tame" is rated 4/5 stars based on 100+ reviews. I love experimenting with new brow products, so I thought I'd give them a try.

I purchased the Eyebrow Kit in the shade "Medium" and the Treat & Tame in the shades Medium and Dark.

ELF Studio Eyebrow Kit contains a colored wax on one side and a brow powder on the other side as well as a small double sided taklon brush that has a rounded side for filling in and an angled side for defining. The kit comes in four (4) different shades. Light, Medium, Dark and Ash. All shades can be viewed here. In the shade Medium, the wax is dark brown and the powder is a chestnut brown. Luckily, it matched my brows very good. The consistency of the wax is not thick or cakey like other brow waxes I have tried in the past. It has just the right amount of pigment.. It applies very lightly and natural & is not at all harsh or overpowering. The brow powder is also very nice. Again, it is not too pigmented and harsh. The two work great together. I have used the brush and it works fine, but for my personal preference, I like to use a full sized brush. I used Coastal Scents Divine Taklon liner brush. I really liked the outcome.
ELF Studio Treat & Tame is a double sided tube that contains a vitamin infused gel that is formulated to "stimulate" hair follicles to re-grow & thicken your brows and the other side is a tinted brow mascara that is infused with fibers so it will grip to your brows and keep them in place. So you've got your treat and your tame. The Treat & Tame comes in four (4) different shades. Light, Medium, Dark and Ash. You can view all of the shades here. As mentioned before, I purchased Medium and Dark. I purchased both because I couldn't find any swatches of the shades to see what they really look like. I was pleased to see that neither shades have any reddish/orange tints to them. The dark brown is like a milk chocolate brown and the medium is simply a shade lighter. I was hoping this was going to be something like MAC's Brow Set.. and I am pleased to say that it is somewhat similar. MAC's Brow Set is much more thick and pigmented though. I always have to wipe off the applicator to make sure I don't apply too much. With the Treat & Tame, it's somewhere in between. It's not tinted for no reason ( like Revlon's Brow Fantasy has a tinted mascara on one side and a pencil on the other.. and the mascara adds absolutely no color to the brows. It may as well be clear). It's pigmented enough to tint my brows to match my brow powder. This gives a better overall, natural look to my brows. Another product I am very pleased with. I haven't actually used the Treat side, and I'm not sure if I will.. but I may just to see if it does anything. 

I used Dark in this photo and it's what I have been using. It matches my hair very well.

Overall, these products worked great for me.. and you can't beat the $3 price tag!

As always, I hope this post was useful for you! And, if any of you have tried these products.. post your thoughts in the comments! :)

Disclaimer: I am in no way affiliated with ELF. I was not paid or compensated in any way for this review. I paid for this product myself and as always, my reviews are honest and are based on my personal experience in using the product.

Monday, October 25, 2010

Tutorial: How I fill in my Eyebrows using MAC Espresso Eyeshadow.

In this tutorial, I'll be showing you how I fill in my brows using an eyeshadow. My favorite eyeshadows to use are matte eyeshadows from MAC. My every-day medium brown shade is MAC Espresso, when my hair is a bit lighter, I use MAC Cork and when my hair is deep-dark, I use MAC Brun.

Products used in this tutorial:

**The little white circles in the photos are shown as guides.

STEP 1:

This may not be a necessary step for those with sparse or fine brows, but very necessary for those with coarse and/or unruly, bushy brows. Use your spoolie and brush your eyebrows upward.

STEP 2:

Now take your scissors, and line them across the topmost, thickest part of the brow. Trim any hairs that are too long.


Already looking better!

STEP 3:

Using your tweezers, pluck any re-growth.

STEP 4:

I always like starting on the underside of my brow and working up. Starting at the beginning of the under-side of the brow, follow your natural brow shape all the way across. The underside can be the harshest line, because it's usually the cleanest/most precise part of your brows if you got them waxed, threaded, etc. The top of the brow is usually more natural. *Make sure to apply light pressure, and don't apply too much product towards the ending (tail) of the brow.

STEP 5:

If your brows are sparse (mine aren't sparse, but I colored them in for the sake of the tutorial) and need to be darkened overall, lightly fill the inside (think of the top and bottom of your brows as borders, and you need to color in between the lines) of your brow with whatever residue is on your brush from Step 4. Again, don't apply too much pressure. Small, light brush strokes work the best. Additional product shouldn't be necessary as you don't want your brows to look harsh or "painted" on.

STEP 6:

Lastly, trace the uppermost part of your brow making sure not to apply too much product towards the beginning or end. To avoid looking unnatural, you can start towards the middle or arch of your brow.

STEP 7:

Comb your lashes with a spoolie to soften any harshness and blend the shadow in better with your brows.

Did you make your brows appear thicker than you wanted to?
Simply take your concealer and a small concealer brush (a Q-tip or clean sponge eyeshadow applicator would work if you don't own proper brushes) and trace the borders of your brow. The concealer acts as an eraser, and will thin out the shape of your brows if you made them too large.

Add a highlight to your brow bone
Adding a shimmery highlight to your brow bone will emphasis the arch in your brow, making your brows appear clean, well-groomed and making your eyes look fresh and more awake. *Adding a bit near your tear ducts wouldn't hurt either!

I hope you found this tutorial helpful!

In addition, here are some swatches of some brow products I own. I couldn't for the life of me find my MAC Brow Crayon in the shade Spiked.


The only pencil I really don't like out of the bunch swatched is the NYC pencil. It is very creamy and goes on clumpy. I prefer a drier textured pencil for my brows. All of the others I like and use depending on the shade of my hair. My favorites remain MAC Espresso & Cork, Maybelline Define a Brow & MAC Eyebrow Crayon.

Tuesday, February 23, 2010

Anastasia Beverly Hills Highlighting Brow Kit Review, Photos & Swatches!

Anastasia Beverly Hills Highlighting Brow Kit

PRODUCT DESCRIPTION: Flawless, fabulous coverage for brows and lids. Our uniquely blended terracotta baked trio is perfect wet or dry, on brows, or an all-over eye highlighter. Known to calm, soothe and soften skin our exclusive Balkan Botanical™ Infusion contains rare plant and herb extracts found only in the rich soil of Romania. Open your eyes to how good real beauty can feel.

This awesome little brow/highlighting kit comes with three shades of brow powder, three shades of highlighter and a mini brow gel. 

The brow trio includes a light golden ash brown (suitable for blondes), light brown/taupe (a universal shade from redheads to medium brunettes) & a med/dark brown (suitable for darker hair shades). 

The highlighting trio includes a shimmery/frosted white with a hint of silver, a shimmery light golden and a shimmery copper.

Highlighting Trio

Brow Trio

Anastasia Clear Brow Gel


Beauty Tip: "Apply baked brow powder (wet or dry) with a brush following the natural shape of your brow. Apply highlighting powder with any eyeshadow crease brush along the brow bone to create a higher arch" - Anastasia.net

I absolutely love this kit! The brow powders are very finely milled (super soft) and apply smooth and sheer, for a natural appearance. I really like the way it makes my brows look. I've tried several brow powders and many of them apply too dark, and I end up having to go over them with Q-tips to soften the color.

I'd recommend this if you like your eye brows to look natural and especially if your brows are very light and you'd like to mainly darken and fill them in, rather than precise shaping. I actually like mixing all of the shades together and it really works for me. I apply the powder using a MAC 266 brush. You can also dip your brush in water and apply the powder for a more defined look. I usually use the brush slightly damp so I can define the outline of my brows better. Lastly, I'll finish my brows off with a sweep of brow gel to keep them in place all day.

Anastasia Brow Powders have a rating of 4.5/5 with an 82% re-purchase rate based on 134 reviews. Click here to view the reviews.

As for the highlighting trio, I'm in love with them! These are very pigmented applied wet or dry. They are the perfect highlight shades, and I love using them on my brow bone (applied wet) and in the corner of my eyes. My favorite of the three colors is the gold. I've been sweeping a light dusting of it on my eyelids on most days of the week.

Price: $32, Ulta.