Wednesday, March 27, 2013

My First Rocksbox - First Impressions, Review, Photos and Discount Code!

Rocksbox

My First Rocksbox

Rocksbox is a brand spanking new membership-based jewelry styling service. I know, another membership site, but Rocksbox is a bit different from the rest. As many other membership sites, you start out by taking a style quiz (or style profile) and based on your selections, a stylist will handpick items for you that should fit your own personal style.

In your Rocksbox, you will receive designer jewelry - (3) items to be exact to trial for up to 60 days. So unfortunately, all of the goodies aren't yours to keep permanently, but if you are interested in purchasing any items you received, you can with a 20% off member discount. What's really cool is that if you don't like your items, you don't have to wait for the month to be over. Just send the items back in the enclosed padded envelope and you'll be sent an alternative package. The amount of items for you to try each month is unlimited, and you will only be charged the one-time monthly fee of $19.

I wasn't sure what to think about borrowing jewelry, but once I received my box I quickly changed my mind.

Here's what I found in my little box:

Rocksbox

Rocksbox

Rocksbox Jewelry

Saturday, March 23, 2013

I'll be back soon!

Hey Everyone!

I just wanted to give you all a quick update and let you know why this whole week has gone by without any new posts.

About two weeks ago my aunt (who lives with my family) went to the hospital for pains she was having, as well as some other minor things. They did a series of tests on her and among some of the problems she was having, she was diagnosed with colon cancer. This past Monday she had surgery to remove the cancer, and thankfully it didn't spread to any of her other organs. So all of this week has mostly been spent in the hospital with my aunt until she recovers. She's doing really well and we're hoping to have her back home as soon as possible.

I asked for prayers on Twitter on the day of my aunt's surgery, and I really appreciate all of your kind responses. Thank you so much!

Hopefully I should be posting again this week.

Talk to you all soon!

xoxo

Saturday, March 16, 2013

MAC Large Duo Pro Palette Review with Photos!

MAC Large/Duo Pro Palette

MAC Large Duo Pro Palette ($25) is a new double-sided pro palette that accommodates two inserts. It has a see-through lid/divider so you can view all of your shades at once while keeping them secure and protected. What's cool about this palette is that you can customize it any way you want. For example, you could turn it into an every-day palette and put blushes, bronzers, etc on one side and eyeshadows on the other.

All of the inserts are sold separately, and they all retail for $9 each. You have the option of purchasing a 15-eyeshadow insert, 6-blush insert, 12-customizable insert (usually for cream foundations, concealers, etc) and 24-customizable insert (for lipsticks and other cream products).

So, if you were to purchase the palette and two inserts, it would cost you $43.

I never use the inserts on any of my palettes, so I took the route of skipping purchasing any inserts for the time being to see how I like the palette as is.

The palette itself is slightly shorter in length than the old style palettes and almost three times the height. Some may find it to be bulky, but I love the fact that the palette is deeper than the old palettes, so there are no issues closing it, unlike the older MAC palettes. It shuts with a magnetic closure, which is really nice.

The old palettes held 8 blushes side by side with no divider. What dissapointed me about the duo palette is because it's slightly shorter, it doesn't hold 8 blushes nicely and uniform like the old palette. Nevertheless, it does hold 8 blushes with a little shifting around.

If you have nails, the clear middle divider is easy to lift up. Sometimes I have trouble with it, which can be slightly annoying, but you can just tilt the palette to get the divider to swing to the other side.


Friday, March 15, 2013

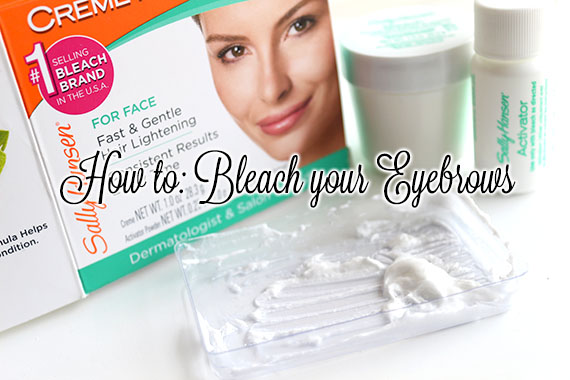
Step by Step: How to Bleach your Eyebrows!

How to: Bleach your Eyebrows

Bleaching my eyebrows was always a part of my regular beauty routine back when I had blonde highlights in my hair or when my hair was a lighter shade of brown. Everyone has their own preference and opinion about matching your eyebrows to your hair color or just bleaching/coloring the eyebrows in general (some like it, some don't), but when done properly, it can really enhance your look.

My eyebrows are very thick, coarse, dark, naturally high arched, non-symmetical (meaning they don't match) and grow quick. Or in other words, nightmare brows. So, I usually have a hell of a time getting them to match every day.

Because I have quite a bit of filling in to do, they can sometimes look too harsh, dark or obvious. I also think that when my brows are super dark, it can create too much emphasis on them, taking away from other features of my face. When they're lighter, the emphasis is taken off my brows and creates more emphasis to my eyes and lips.

In this post, I'm going to briefly go over how you can achieve lighter eyebrows in some really simple steps.

Tools Needed: 

  • Facial Bleach (I'm using Sally Hansen Creme Hair Bleach for the face)
  • Spoolie (or a clean cosmetic wand)
  • Vaseline (optional)
  • Purple Shampoo or Hair Toner (optional - I'm using Clairol Shimmer Lights Shampoo)

My Eyebrows before and after bleaching them.