|
| Photo Credit: http://celebrity-gossip.net |
 |
| Photo Credit: http://celebrity-gossip.net |
 |
| Photo Credit: http://celebrity-gossip.net |
Kate Middleton looked absolutely beautiful on her wedding. From her simple, and elegant dress - to her brunette locks and her glowing complexion.
Keep Reading to re-create Kate Middleton's Bridal look yourself!
Like many of you may of already read on various social media sites, Kate decided on doing her very own makeup for her wedding, after she had taken a few makeup lessons from renowned makeup artist
Arabella Preston.
She kept her makeup simple and sophisticated. She went for a subtle smokey eye, pinked coral cheeks and a nude lip.
To Get Kate Middleton's Look:
You can tell by photos that Kate takes wonderful care of her skin. Her overall complexion is very even and radiant, and she doesn't seem to have any visible blemishes. Because her skin doesn't need very much coverage, she can get away with a light foundation. Because it's a long day for Kate and she was being photographed and filmed, a foundation with a little bit more coverage than usual is most suitable for her. Nothing too heavy, but a foundation that won't budge much or get oily throughout the ceremony and one that photographs well.
A good foundation with medium coverage and a satin finish will look best. Matte foundations can sometimes make the skin appear dull, and foundations with a dewy finish can make your skin appear oily soon after it has been applied. Also, a foundation with very little to no SPF will suit you well, because foundations with higher SPF's can make your face appear pale in photos. You want to make sure your neck and face match.
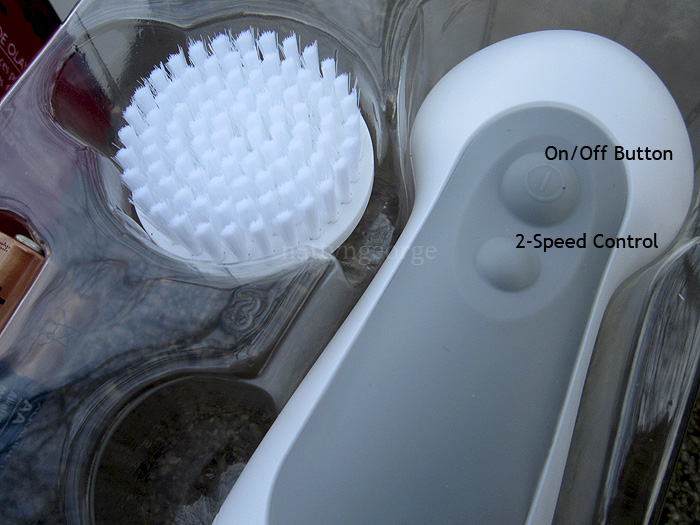
Prep: To avoid looking dull, make sure your skin is well exfoliated. It's best to exfoliate 1-2x a week with a mild scrub, or with facial brush, exfoliation glove, etc. Exfoliating will buff away your uppermost dead skin cells, and your skin will appear more even and radiant. Make sure you skin is well moisturized before applying the foundation. You don't want anything too oily or heavy. I like using
DDF Ultra-Lite Oil-Free Moisturizing Dew. Another alternative is
Evian Mineral Water Spray, essentially, water in a can that sprays out in an ultra-light mist to "refresh" your skin - before and/or after makeup.
To appear more radiant, you can apply a moisturizer that contains iridescent particles, such as
MAC Strobe Cream. If you feel it is necessary, you can prime your skin. Primers generally help your foundation glide across your face easier, as it evens out your skin texture, thus giving your foundation a more even look. For this, I like using
Hard Candy Sheer Envy Primer.
Concealer: Once your skin is prepped, you want to apply concealer to areas that need concealing. My favorite heavy duty concealer is
Hard Candy Glamoflauge. With your fingertip, apply a tiny dot of concealer to any red marks/blemishes that need concealing. To blend, lightly tap the area with your finger or use a blending brush such as the
MAC 224 Tapered Blending Brush or
Sigma E40 Tapered Blending Brush for the softest finish. The next area that needs concealing is your under-eyes. Make sure your under eyes are well moisturized so your concealer goes on effortlessly. For severe dark circles, apply a corrector first such as the
Bobbi Brown Corrector with your fingertips. Focus on applying it to the hollows of your eyes, rather than the area directly under your lash line, as too much can actually draw attention to your fine lines. Then, apply your concealer by putting a tiny dab on the tip of your ring finger and lightly pat it until it is blended. If you need more, apply a very light, second layer. Don't apply too much at once, as it can look cakey. To further blend your concealer, you can again, use a Tapered Blending Brush.
Foundation: Now, it's time for your foundation.
MAKE UP FOREVER HD Foundation is an excellent choice for a foundation because it doesn't contain any SPF, and it photographs beautifully. There is also a wide variety of colors, so you should be able to find your correct color match. Shake the bottle very well and apply a pump in your clean palm, or a clean surface. Take your fingertip and dot the foundation on all areas of your face (cheeks, chin, forehead, nose). Then, take a foundation brush such as the
MAC 187 Duo-Fibre Brush,
MAC 130 Short Duo Fibre Brush or
Sigma F80 Flat Top Synthetic Kabuki Brush and gently blend the foundation all over your face in small, circular motions. For a more precise application, and to get to small areas (around your brows, nose, hairline, etc) you can use a standard foundation brush such as the top rated
Bobbi Brown Foundation Brush. Avoid applying too much foundation in areas that
do not need coverage. Such as around your eyes, upper lip, between brows, etc. These are areas that tend to create dark shadows when too much foundation is applied. Focus on the areas that you need the most coverage, such as your cheeks & chin. If you need to go back to apply more foundation, you can lightly dip the tip of your brush in the foundation stipple it over the areas that need it, and again, blend. Once everything is blended, I personally like to go back with a clean,dry foundation brush and blend/buff it further for about a minute to ensure everything is well blended and to give my face a flawless finish. A brush that isn't very dense, such as a Duo-Fiber works great.
Bronzer/Contour Powder: Kate's skin has a very subtle bronze glow. To achieve this, take a natural, matte bronzer and with a small blush or contour brush, such as the
Sigma F40 Large Angled Contour Brush and apply a very light dusting of bronzer, starting at the highest point of the hollows of your cheeks and bringing the color through your hollows, stopping at the apples of your cheeks. Then, bring the bronzer up your temples and forehead, blending it into your hairline. This will make your face appear slimmer and more sculpted. A good matte bronzer to use is
NYC Sunny Bronzer or
Benefit Hoola. The reason to use a matte bronzer opposed to a bronzer that contains shimmer is because any shimmer will highlight (draw light to) a certain area. We are trying to "contour" by creating shadows (removing light from areas).
Blush: Kate wore a beautiful pinked coral blush with a warm undertone to her cheeks for a healthy, pink glow. With a small blush brush, such as the
ELF Studio Blush Brush, lightly swirl it through a pinked coral blush such as
MAC Dainty Mineralize Blush or
Benefit Bella Bamba and apply it to the apples of your cheeks. Then, dust off your brush with a napkin to remove any excess color and blend it upwards, so your bronzer and blush are merged into each other. If you made the mistake of applying too much, take your powder brush and lightly go over your cheeks.
Brows: Kate has strong, dark brows. They aren't at all overpowering or harsh outlined. To achieve her natural look, use a brow powder that matches your hair color. MAC Brun Eyeshadow
(muted black brown) works great for deep, dark brunettes, MAC Espresso
Eyeshadow
(medium golden brown) works great for medium brunettes and MAC Cork
Eyeshadow
(light golden brown) works great for light brunettes and blondes. Use an angled brow brush, such as the
MAC 266 Small Angle Brush and follow the natural shape of your brows. To soften the edges of your brows, clean off the brush and run it across the edges of your brows.
To check out two of my brow tutorials, go
here or
here.
 Eyes:
Eyes: To recreate Kate's natural, smokey eye, first apply a very thin layer of an eyeshadow base with your fingers all over your lid to avoid any creasing of your eyeshadow.
Urban Decay Primer Potion,
MAC Paint Bare Canvas Paint or
MAC Bare Study Paint Pot all work great. Then, take a champagne colored eyeshadow, such as
MAC Shroom or MAC
Naked Lunch and apply it lightly over your lid, stopping above your crease. Then, take a soft brown, such as
MAC Cork and apply it lightly through and above your crease to create a light shadow. Extend it slightly outward past your eyes. Then, apply a glistening taupe, such as
MAC Satin Taupe lightly through your crease. Apply a warm vanilla shade as a brow highlight, such as
MAC Rice paper. Blend everything together with a soft blending brush so they aren't any harsh lines. My favorite blending brush is the
Sigma E70 Medium Angled Shading Brush. It appears Kate lined her eyes with a deep shadow. It doesn't look quite black, it looks rather a matte charcoal. It also looks very precise, it doesn't look like she used a smudge brush - rather an angled brush (like the MAC #266 mentioned above for the brows). A great matte, charcoal shadow to use for lining the eyes is
MAC Typographic. She lined her upper a bit thick, and applied it much thinner to her lower lash line. It also looks like she may of deepened the line with a black gel liner or black shadow.. such as
Bobbi Brown Long Wearing Gel Liner in Black Ink or
MAC Carbon Eyeshadow. You can tell the black line is extremely thin, and isn't
too black. The emphasis is mainly on the thicker, softer charcoal shade she lined her top lash line with. You can take the same angled brush and lightly tap it across your lash line as close as possible to your natural lashes with the darker product. A light coat of waterproof mascara will do, as she doesn't have much emphasis on her lashes. My favorite is
Covergirl Lash Blast Mascara, as it is smudge proof.
 |
| Photo Credit: http://celebrity-gossip.net |