Showing posts with label Tutorial. Show all posts

Friday, March 15, 2013

Step by Step: How to Bleach your Eyebrows!

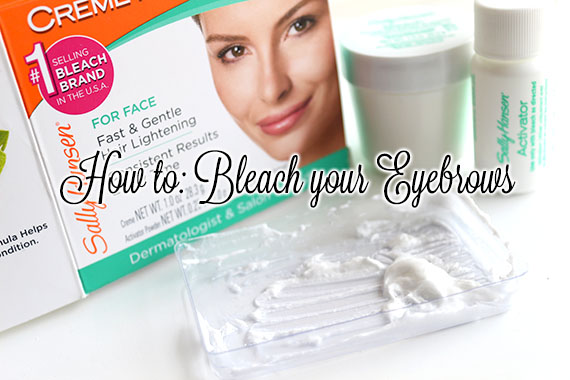
How to: Bleach your Eyebrows

Bleaching my eyebrows was always a part of my regular beauty routine back when I had blonde highlights in my hair or when my hair was a lighter shade of brown. Everyone has their own preference and opinion about matching your eyebrows to your hair color or just bleaching/coloring the eyebrows in general (some like it, some don't), but when done properly, it can really enhance your look.

My eyebrows are very thick, coarse, dark, naturally high arched, non-symmetical (meaning they don't match) and grow quick. Or in other words, nightmare brows. So, I usually have a hell of a time getting them to match every day.

Because I have quite a bit of filling in to do, they can sometimes look too harsh, dark or obvious. I also think that when my brows are super dark, it can create too much emphasis on them, taking away from other features of my face. When they're lighter, the emphasis is taken off my brows and creates more emphasis to my eyes and lips.

In this post, I'm going to briefly go over how you can achieve lighter eyebrows in some really simple steps.

Tools Needed: 

  • Facial Bleach (I'm using Sally Hansen Creme Hair Bleach for the face)
  • Spoolie (or a clean cosmetic wand)
  • Vaseline (optional)
  • Purple Shampoo or Hair Toner (optional - I'm using Clairol Shimmer Lights Shampoo)

My Eyebrows before and after bleaching them. 

Sunday, November 18, 2012

How to Apply the Perfect Winged Eyeliner Every Time!

Applying winged eyeliner is difficult, even for those who apply it every day. I've been winging my eyeliner since I was around 14 or 15 years old, and I still don't get it right on many days.

There are so many methods for applying winged eyeliner, but today, I'm going to over the way I typically like to apply pen style eyeliners. I find that when I use this method, my liner turns out perfect every time! And, it's super quick!

The eyeliner I'm using in this mini tutorial is my one of my favorite eyeliners - the Physicians Formula 2-in-1 Lash Boosting Eyeliner + Serum. It's incredibly easy to use, the tip is perfectly shaped for a thin, precise line and it never dries out or frays.


Step 1: In the first photo I started out with a clean eye. Typically, the ideal time to apply eye liner is after your eye shadow and before your mascara. (For the records, I'm wearing mascara for this tutorial, but it's much easier to apply eyeliner without mascara, as your lashes won't get in the way as much.) *If your eyelids are prone to getting oily, powder your lids and apply an eye shadow base.
Step 2: Examine where you want to start your wing. Use your bottom lashline as a reference. In photo #2 you can see the arrow going from my bottom lashline extending diagonally outward. You almost want it to look like a continuance of your lower lashline.
Step 3: With the tip of the liner touching the very end of your upper lashline, draw a thin diagonal line (45 degree angle) upward as shown in photo #3. It should be going in the direction of where your eyebrow ends.

Monday, October 15, 2012

Step by Step Eyebrow Filling Tutorial.

How to Fill in the Eyebrows

Everyone uses different brow filling methods - some swear soley by pencils, while others prefer brow powders. You may even prefer a cream product (such as a brown cream liner) or a brow-marker (such as Milani Brow Tint Pen). I love switching up products all of the time, so my brow routine changes often. Today, I'm going to go through one way I fill in my brows using both an eyebrow pencil and an eyebrow powder.

Don't feel the need to go run out and purchase a brow powder - Any matte brown eyeshadow similar to your hair color will do. Although we all favor and thrive for eyeshadows with lots of pigment, we don't necessarily look for the same in our brow products because we want our brows to look to look natural. So, finding an inexpensive shadow at the drugstore should be a sinch. And, if you don't own an eyebrow pencil, you can use a brown eyeliner - but don't apply it straight on as it can look too intense for your brows. Scribble on the back of your hand, and run your brush through the product for a more natural look (or you can just lightly rub your brush across the tip of the pencil).

I don't always use both products, but I like combining both because the pencil yields a very precise, clean line, whereas the brow powder gives a softer, more natural diffused line. The result is a very clean and precise brow, yet it's not as clean/chiseled as it would be if only a pencil was used.


Products I used in this tutorial-
Anastasia Highlighting Brow Kit
MAC Eyebrows (Pencil) in the shade Spiked
MAC Studio Finish Concealer
MAC 208 Angled Brow Brush
MAC 194 Concealer Brush
E.L.F. Eyelash and Brow Wand (Spoolie)
Tweezerman Brow Shaping Scissors
Revlon Tweezers
Eyebrow Razor

Here's the classic diagram of where your brows should ideally start, arch and end. Since we all have different face shapes, natural brow shapes, etc, this figure might not work for everyone. It's often referred to as the ideal brow - with the beginning of the brow lining up with the side of your nose (if you hold a pencil vertical to your nose, it should line up with the beginning of your brows). But depending on the symmetry of your nose, placement of the eyes (if they are very far apart for instance), etc, this method may not work. Instead, use your tear-ducts as a reference of where your brows should start. The arch should ideally line up with the edge of your iris. Your brow should ideally end diagonal (45 degrees) from the outer corner of your eye.

Wednesday, September 5, 2012

Natural Olive Green Eyeshadow Tutorial.


A super-quick tutorial today using a few different products. It's very simple, but I really like the combination of shades, and I've been wearing it often for day or night.

You can add white pencil liner to the waterline to brighten up the eyes, or add black liner for a more intense look. I sometimes like popping a little black liner on my lid and cutting some false lashes in half and add them to the the outer half of my eyes for added drama.

Products Used:
MAC Sweet Sage Fluidline discontinued shade (used in step 2 and 3)
MAC Club Eyeshadow (used in step 5)
Yellow-Green Eyeshadow from LA Colors Private Eye Palette (used in step 6)
MAC Nylon Eyeshadow (used in step 7)
Maybelline The Falsie's Mascara (used in step 8)

Brushes Used:
Sigma F70 Concealer Brush (used in step 2)
Sigma E65 Small Angle Brush (used in step 3)
Sigma E40 Tapered Blending Brush (used in step 4)
Sigma E30 Pencil Brush (used in step 5 and 7)
Sigma E25 Blending Brush (used in step 6)

Wednesday, July 11, 2012

How to Create Ombre Nails!

ombre nails tutorial

In the fashion and beauty world, we've become obsessed with gradients. From dip-dying our shirts, to our hair to our finger tips, we can't seem to get enough of the trend. The ombre manicure is something incredibly simple and easy to do, and the results are very cool!

There are many different ways you can create ombre/gradient nails, but today I'll be showing you one method, using a craft sponge.

Tools needed:

* You can use any three (more or less) shades you'd like! You can use different colors, or different variants shades of the same color.
* Make sure to allow your nails to properly dry before moving on to the following step.
* If the polish on your nails appear bumpy after using the sponge, don't worry, it will all even out by the time a top coat is applied.

How to Create Ombre Nails in 5 Steps

Step 1: Paint your nails with your chosen base color. Depending on the opacity of the polish, paint 1-2 coats.

Step 2: Pour a little nail polish on the piece of wax paper that will follow. Dip the tip of the brush in the polish. Now, lightly lay the brush on your nail, lining the brush up with the side of your nail, and rotate, or roll your finger against the sponge to coat the bottom half of the nail. Or, you can simply tap the brush across the bottom half of your nail.

Step 3: With the tip of the sponge, lightly tap where the second color began to create more of a gradient effect. Also add to any areas that needs additional polish.

Step 4: Repeat Step 2 with your final shade, but this time only covering 1/2 of the previous color. White would have looked cool for my nails, but I wanted a little more flare, so I chose a holographic glitter.

Step 5: Finish off your nails with your favorite top coat. I like using a fast-dry top coat to reduce the chance of nicks and smudging.

ombre nail polish tutorial

Sunday, July 8, 2012

Green and Brown Cut Crease Eyeshadow Tutorial!


Green is actually one of my favorite colors, but I normally shy away from colored eye shadow. I've been wanting to do a look with green eye shadow, so this morning I decided to mess around a little bit with some green and snap some photos during the process.

Green looks great paired with almost every color. It's a earthy color, so it looks great paired with warm autumn shades (brown, gold, burgundy, orange, etc.) and it also works well paired with bright, floral shades (pink, purple, blue, etc.) You all know that I love my neutral and warm shades - so my favorite pairing is brown and gold.

I actually don't own very many green eye shadows - in fact, I got rid of most of them a while ago because they started collecting dust in my drawers (well, not exactly, but you know what I mean.) I would've loved to use an olive green for this look - I've had MAC Sumptuous Olive on my "to buy at some point" list for ages, so I'm definitely going to add it to the top of my shopping list.

Anyways, enough babbling..


Products Used:
Maybelline Bold Gold Color Tattoo Cream Eyeshadow (used in Step 1)
YSL Absinthe Green 4-Colour Harmony for the Eyes (used in Step 2)
MAC Retrospeck Eyeshadow (used in Step 3)
MAC Tempting Eyeshadow (used in Step 4)
MAC Brun Eyeshadow (used in Step 5 and 7)
Urban Decay Half Baked Eyeshadow (used in Step 8)
Physician's Formula 2-in-1 Lash Boosting Brown Eyeliner (used in Step 9)
Elizabeth Arden Caramide Mascara (review soon!) (used in Step 10)
Ardell #116 False Lashes (used in Step 11)

Brushes Used:
Sponge Applicators (used in Step 1, 2 and 3)
Sigma E30 Pencil Brush (used in Step 4)
Small Generic Shader Brush (used in Step 5)
Sigma E65 Small Angle Synthetic Brush (used in Step 7 & 8)

*A non-shimmery base would've worked better for this tutorial - I used gold to warm up the green, but this base in particular made the otherwise smooth, pigmented green appear patchy.

*A thinner line with a matte, cream eyeliner would've worked better for this tutorial (I made it too thick, and it was pretty much irreversible!)

*When using tape, make sure to press the tape on the back of your hand a couple of times before applying it to your face. You don't want it to be very sticky, because you don't want the tape pulling your skin when you remove it.

Tuesday, June 26, 2012

Step by Step Smokey Taupe Eyeshadow Tutorial!

mac eyeshadow tutorial

Smokey Taupe Eyeshadow Tutorial

One of my favorite eyeshadows is MAC Satin Taupe. It's a really pretty frosty taupe (gray brown) that looks great with a variety of looks. It looks amazing paired with brown and burgundy - One of my favorite ways of wearing it is by applying a dark brown base to my lids and layering Satin Taupe over top, to intensify and slightly deepen the color, then apply a soft golden brown through the crease, and a reddened brown through the outer-v. The burgundy mixed with the taupe almost gives off a slightly mauve/plum tone that really brings out the green in my eyes. 

I'll be doing just that in this tutorial, but I'm making the look a bit more dramatic by adding black eyeshadow and liner. 

To make this look more daytime appropriate: The black shadow, liner and faux lashes are what really intensify this look, so for something a little lighter and more wearable during the day, skip step 7, 9, 10 and 12. You really don't have to line your eyes at all (I wear this look often during the day without liner), but if you'd really like to, you can opt for a dark brown liner for the top lash line.


Products Used:
Nars Smudeproof Eyeshadow Base (used in step 1)
MAC Constructivist Paint Pot (used in step 2 and 3)
MAC Satin Taupe Eyeshadow (used in step 4)
MAC Soba Eyeshadow (used in step 5)
MAC Handwritten Eyeshadow (used in step 6)
MAC Carbon Eyeshadow (used in step 7)
MAC Crystal Avalanche and Nylon Eyeshadows (used in step 8)
MAC Retrospeck Eyeshadow (used in step 8)
YSL Eyeliner Effect Deep Black Faux Cils Cream Liner (used in step 9)
Covergirl Lash Blast Mascara (used in step 11)
KKCenterHK False Lashes #ES A562 (used in step 12)
Lorac 3-in-1 Waterproof Eyeliner Pencil (used to line my waterline afterward - for reference, I would not recommend this liner)

*Notable dupes for Satin Taupe: Wet n Wild Nutty Color Icon Single Eyeshadow ($1.99), NYX Iced Mocha Single Eyeshadow ($4.99), Covergirl Tapestry Taupe Eye Enhancers 1 Kit Eyeshadow ($4), E.L.F Moon Dust Custom Eyes Eyeshadow ($1). (Prices will vary based on location)

Brushes Used:
Generic Concealer Brush (used in step 2, 3 and 4)
ELF Studio Contour Brush (used in step 5)
MAC 219 Pencil Brush (used in step 6, 7 & 8; cleaned & used for the inner corner only. I used my fingertip for the brow bone highlight)
Coastal Scents Synthetic Fine Liner Brush (used in step 9)
Coastal Scents Small Detail Brush (used in step 10, to drag the liner upward and smudge)

Misc:
MAC Quite Natural Paint Pot was used to fill in my brows


Saturday, May 19, 2012

My Everyday Face Routine.

My Everyday Face Routine


This post isn't really supposed to be hugely informative, but I thought it would be a fun post to quickly go through my typical day makeup. My routine is never really "solid" as I change up products from day to day, otherwise I'd never get through any of my products.

On a daily basis I keep my eyes very simple. The colors always change, but what stays the same is that I always apply MAC Brule all over my lids as a base and smudge color across my top and bottom lashline, followed with lots of mascara.

Products Used (in order used)
MAC Pro Longwear Concealer in NC20
Hard Candy Glamoflauge Concealer in Medium
Estee Lauder Double Wear Foundation in Tawny (applied with Real Techniques Stippling Brush)
MAC Eyebrows Retractable Pencil in Spiked
Spoolie Tool
Guerlain Meteorites Powder (applied with a Sigma F30 Large Powder Brush)
Becca Flamenco Bronzing Powder (applied with Coastal Scents Destiny Kabuki on a Stick Brush)
MAC Honey Rose Magically Cool Liquid Powder (applied with Kirkland Stippling Brush)
Nars Dolce Vita Blush (applied with Kirkland Stippling Brush)
MAC Brule, Club and Nehru Eyeshadows
Shu Uemura Eyelash Curler
Shiseido Nourishing Mascara Base
Covergirl Lash Blast Fusion Mascara
MAC Viva Glam Nicki Lipstick
NYX Nude Peach Mega Shine Lipgloss

I'll be doing individual posts on application technique (how to apply concealer, blush, bronzer, etc) because I'd like to explain in detail, rather than briefly in a quick tutorial.

Thursday, May 3, 2012

A simple & pretty eyeshadow tutorial, using one eyeshadow and an eyeliner!

Here's the look we're going to achieve...
eyeshadow tutorial

I wanted to do this really simple, but really pretty tutorial today using only one eyeshadow and a few basic tools. You can do the same look using any color you want - it definitely doesn't have to be the same color I chose and you can make any substitutions you'd like!

Products Used:
Urban Decay Primer Potion *not pictured (used in step 1)
MAC 'Bronze' Eyeshadow (used in step 6 and 8)
MAC 'Feline' Kohl Eye Pencil (used in step 2 and 4)
Maybelline Great Lash Lots of Lashes Mascara (used in step 10)

Brushes/Tools Used:

Sponge applicator (to pack on the color, used in step 6)
Precision Tip Cotton Swabs (for smudging the eye liner, you can use any brush or pointed sponge applicator if you'd like - used in step 3 and 5)
Sigma Small Angle Brush (used in step 8)
Coastal Scents Tapered Blending Brush (used in step 7)

mac eyeshadow tutorial

Tuesday, April 17, 2012

Step by Step Golden Bronze Eyeshadow Tutorial.

gold eyeshadow tutorial

I haven't done a tutorial in a while, so I thought I'd share with you one of my go-to looks when going out. It may seem like a lot of steps, but it's actually very simple, and it takes me all about five minutes to do. You can step it up a notch for night-time wear by adding false lashes and/or liner on the waterline, or you can tone it down for day-time wear by subtracting the outer-v color and liner.

Products Used:
Urban Decay Eyeshadow Primer (used in step 1)
MAC Brule Eyeshadow (used in step 5)
MAC Woodwinked Eyeshadow (used in step 2 and 4)
MAC Soba Eyeshadow (used in step 3)
MAC Tempting Eyeshadow (used in step 6)
MAC Brun Eyeshadow (used in step 7 and 8)
Loreal Endless Pearl Infallible Eyeshadow (used in step 10)
MAC Dipdown Fluidline Eyeliner (used in step 9)
Clarins Extra Definition Mascara (used in step 11)

Brushes Used:
Coastal Scents Small Eyeliner Brush
Sigma Small Angle Brush
Sigma Pencil Brush
Sigma Large Shader Brush
Coastal Scents Tapered Blending Brush


CONTINUE READING!

Monday, October 25, 2010

Tutorial: How I fill in my Eyebrows using MAC Espresso Eyeshadow.

In this tutorial, I'll be showing you how I fill in my brows using an eyeshadow. My favorite eyeshadows to use are matte eyeshadows from MAC. My every-day medium brown shade is MAC Espresso, when my hair is a bit lighter, I use MAC Cork and when my hair is deep-dark, I use MAC Brun.

Products used in this tutorial:

**The little white circles in the photos are shown as guides.

STEP 1:

This may not be a necessary step for those with sparse or fine brows, but very necessary for those with coarse and/or unruly, bushy brows. Use your spoolie and brush your eyebrows upward.

STEP 2:

Now take your scissors, and line them across the topmost, thickest part of the brow. Trim any hairs that are too long.


Already looking better!

STEP 3:

Using your tweezers, pluck any re-growth.

STEP 4:

I always like starting on the underside of my brow and working up. Starting at the beginning of the under-side of the brow, follow your natural brow shape all the way across. The underside can be the harshest line, because it's usually the cleanest/most precise part of your brows if you got them waxed, threaded, etc. The top of the brow is usually more natural. *Make sure to apply light pressure, and don't apply too much product towards the ending (tail) of the brow.

STEP 5:

If your brows are sparse (mine aren't sparse, but I colored them in for the sake of the tutorial) and need to be darkened overall, lightly fill the inside (think of the top and bottom of your brows as borders, and you need to color in between the lines) of your brow with whatever residue is on your brush from Step 4. Again, don't apply too much pressure. Small, light brush strokes work the best. Additional product shouldn't be necessary as you don't want your brows to look harsh or "painted" on.

STEP 6:

Lastly, trace the uppermost part of your brow making sure not to apply too much product towards the beginning or end. To avoid looking unnatural, you can start towards the middle or arch of your brow.

STEP 7:

Comb your lashes with a spoolie to soften any harshness and blend the shadow in better with your brows.

Did you make your brows appear thicker than you wanted to?
Simply take your concealer and a small concealer brush (a Q-tip or clean sponge eyeshadow applicator would work if you don't own proper brushes) and trace the borders of your brow. The concealer acts as an eraser, and will thin out the shape of your brows if you made them too large.

Add a highlight to your brow bone
Adding a shimmery highlight to your brow bone will emphasis the arch in your brow, making your brows appear clean, well-groomed and making your eyes look fresh and more awake. *Adding a bit near your tear ducts wouldn't hurt either!

I hope you found this tutorial helpful!

In addition, here are some swatches of some brow products I own. I couldn't for the life of me find my MAC Brow Crayon in the shade Spiked.


The only pencil I really don't like out of the bunch swatched is the NYC pencil. It is very creamy and goes on clumpy. I prefer a drier textured pencil for my brows. All of the others I like and use depending on the shade of my hair. My favorites remain MAC Espresso & Cork, Maybelline Define a Brow & MAC Eyebrow Crayon.
Wednesday, July 29, 2009

Tutorial: Smokey eyes with a hint of pink!


FACE: Studio Fix Fluid NC40
Ben Nye Concealer
Ben Nye Translucent Set Powder
Smashbox Soft Lights Blush in "Blushing Pink"
MAC "Dame" Blush
MAC "Honour" blush for highlight.

EYES: HIP Paint in "Secretive" for a base
NYX "Black" eyeshadow
NYX Triple shadow palette in #36
MAC "Pink Venus" eyeshadow
MAC "Your Ladyship" pigment
L'Oreal extra intense liquid liner pencil in black
L'Oreal Extra Volume Collagen Mascara
Ardell #45 faux lashes

LIPS: MUFE lip liner in 4C
Revlon lipgloss in Pink Diamond.

First, I applied moisturizer to my face, applied concealer with my concealer brush and my foundation with my MAC 187 brush. Then, I set my foundation with powder. I use my blush brush for this, and sweep it all over my face. (I didn't take pictures of these steps because I didn't start my tutorial with a bare face.) Now on to the eyes..

STEP 1: I take my L'Oreal HIP Paint and apply it all over my lid with the brush it came with, and then blend it with my finger tip.


Friday, July 24, 2009

TUTORIAL: How I apply my everyday makeup.

There was a couple requests for this. My skin at the moment is HORRIBLE and I'm breaking out like crazy.. that's why I really didn't want to do a step by step showing close ups of my skin. But anyway, here goes. This is the stuff I mainly use for an every day look.


#1 Estee Lauder Daywear Plus Moisturizer 
#2 MAC Studio Sculpt Concealer NW25 
#3 MAC 194se concealer brush 
#4 Estee Lauder Double Wear Foundation in Tawny 
#5 MAC 187 Duo Fibre Brush 
#6 MAC 316se lip brush (i use it for my brows) 
#7 Urban Decay Twice Baked e/s 
#8 Ben Nye Neutral Set Powder mixed with a bit of MUFE powder for color 
#9 MAC 168 Angled brush 
#10 MAC 129se Blush brush 
#11 MAC Refined Golden bronzer (crushed) 
#12 Christian Dior Sunrise Party Blush 
#13 Loreal Extra Intense Liquid eye liner pencil 
#14 YSL Faux Cils Mascara 
#15 Ardell Fashion lashes 104 
#16 DUO black eyelash adhesive 
#17 MUFE aqua lip pencil in 4C 
#18 MAC Partial to Pink Cremesheen glass 
#19 MAC Hue Lipstick.

STEP 1: I moisturize my face, concentrating on dry areas of my face.

STEP 2: I take my concealer brush and concealer and apply it under my eyes, under my brows, in the corners of my nose and on any blemishes that need concealing.


STEP 3: I take my MAC Duo Fibre brush and dip the white tips of the brush in my foundation. Then, in a stippling motion, I apply it to my whole face. Then, I lightly brush my face so it is all blended. (I have a lot of product on the brush.. it was enough for my whole face)


STEP 4: I fill in my brows with my mac lip brush and my urban decay eye shadow.


STEP 5: I take my MAC angled contour brush and dip it in the Ben Nye powder and blend it under my eyes so it won't cake. You may also apply it to your cheeks or whole face, but I didn't. I wanted a little bit of a dewy look even though this is a matte foundation.


STEP 6: Apply bronzer lightly all over my face with my MAC blush brush. Mainly applying it to the bridge of my nose, cheekbones and near the hairline of my forehead.


STEP 7: I lightly apply blush to the same brush and apply it to my cheekbones. I smile when I apply it so my cheeks pop..


STEP 8: I take my black pencil liner and line the outer corners of my eyes, a half way line under my eyes and on my lid. I only do it halfway so its not too dramatic for a daytime look. Then I take a smudge brush (or smudge applicator) and smudge the lines so they aren't harsh.


STEP 9: I apply mascara to my top and bottom lashes. (love this mascara!)


STEP 10: Apply my faux lashes with a small amount of adhesive. Then use a little more eyeliner to blend the strip on your eye lid. Use the smudge brush again. (pic #2 is unblended, pic #3 is blended) 


STEP 11: I apply my lip liner and then use my fingertip to blend it into my lips. I then apply Hue lipstick and partial to pink lip gloss.


done! kisssssssesssssssss!!!!